Little Neck Clams in Coconut Curry Soup

2015-03-23 19.02.29 - Copy

Clams! Yum right? I always wanted to learn how to cook these little suckers, but I was always worried that they might be too complicated. I was pleasantly surprised to learn that they are even easier than making an omelette!  Seriously no joke here people, this dish is so easy, but so delicious that it will make even your most anti-seafood friends scarf down bowl after bowl of this yummy dish!

I don’t know about you, but I love curry. Anything in curry makes me happy. A soup that combines the rich spiciness of curry with the crisp sweetness of coconut is perfect for me. I know that often times many foreigners don’t like to cook with curry, but I really love the extra kick it adds to all of my food.

Today I will be sharing with you a quick easy recipe you can make with Little Neck Clams.

Little Neck Clams

Little Neck Clams

For starters what are little neck clams you may ask? Well these edible clams are little marine mollusks that live along the eastern coast of North & Central America. They are also called: hard clams or chowder clams. These clams come in many different sizes.

images

Some are really small.

Some are large.

Some are large.

Looking at these little creatures at first it might be hard to imagine someone actually eating them. These clams can be prepared in several ways. They can be eaten raw with cocktail sauce, horseradish, and lemon. They can be steamed and dipped in butter. Most of the time though this breed of clam is most often used in soups and stews.

Today I’m going to share with you all a recipe I learned for Little Neck Clams in Coconut Curry.

Little Neck Clams in Coconut Curry Soup

Ingredients: 

  • 3 cups of store bought Tamarind Chili Sauce
  • Sesame Oil
  • 2 tablespoons of chopped shallots
  • 2 teaspoons of diced peeled ginger
  • a pinch of chili powder
  • 1 cup of thickly sliced white mushrooms
  • 3 cups of little neck clams
  • 1- 8 oz. can of coconut milk ( you can add more coconut milk if you want more soup liquid).
  • 1 tablespoon of fresh cilantro
  • Optional: Plain rice crackers as garnish

Tools:

  • a pan
  • a wok
  • cutting board
  • sharp knife
  • slotted spoon for stirring the clams
  • a stove

Directions: 

  1. If your clams are frozen then first you need to let them thaw.  Make sure to thaw them overnight by soaking them in clean water in a bowl in the refrigerator the day before you will cook with them. Just place the frozen clams in an airtight container filled with ice water that is enough to cover them all completely.  Raw clams only survive two days in the refrigerator before bacteria renders the seafood unsafe to eat. So if you thaw them out you need to be ready to use them immediately.
  2. After your clams have been thawed you want to quickly rinse them off in cool water making sure to remove any grime or sand that might have come out of them while they thawed.
  3. To cook the clams first wash, dry, and chop up your shallots, ginger, mushrooms, and cilantro.
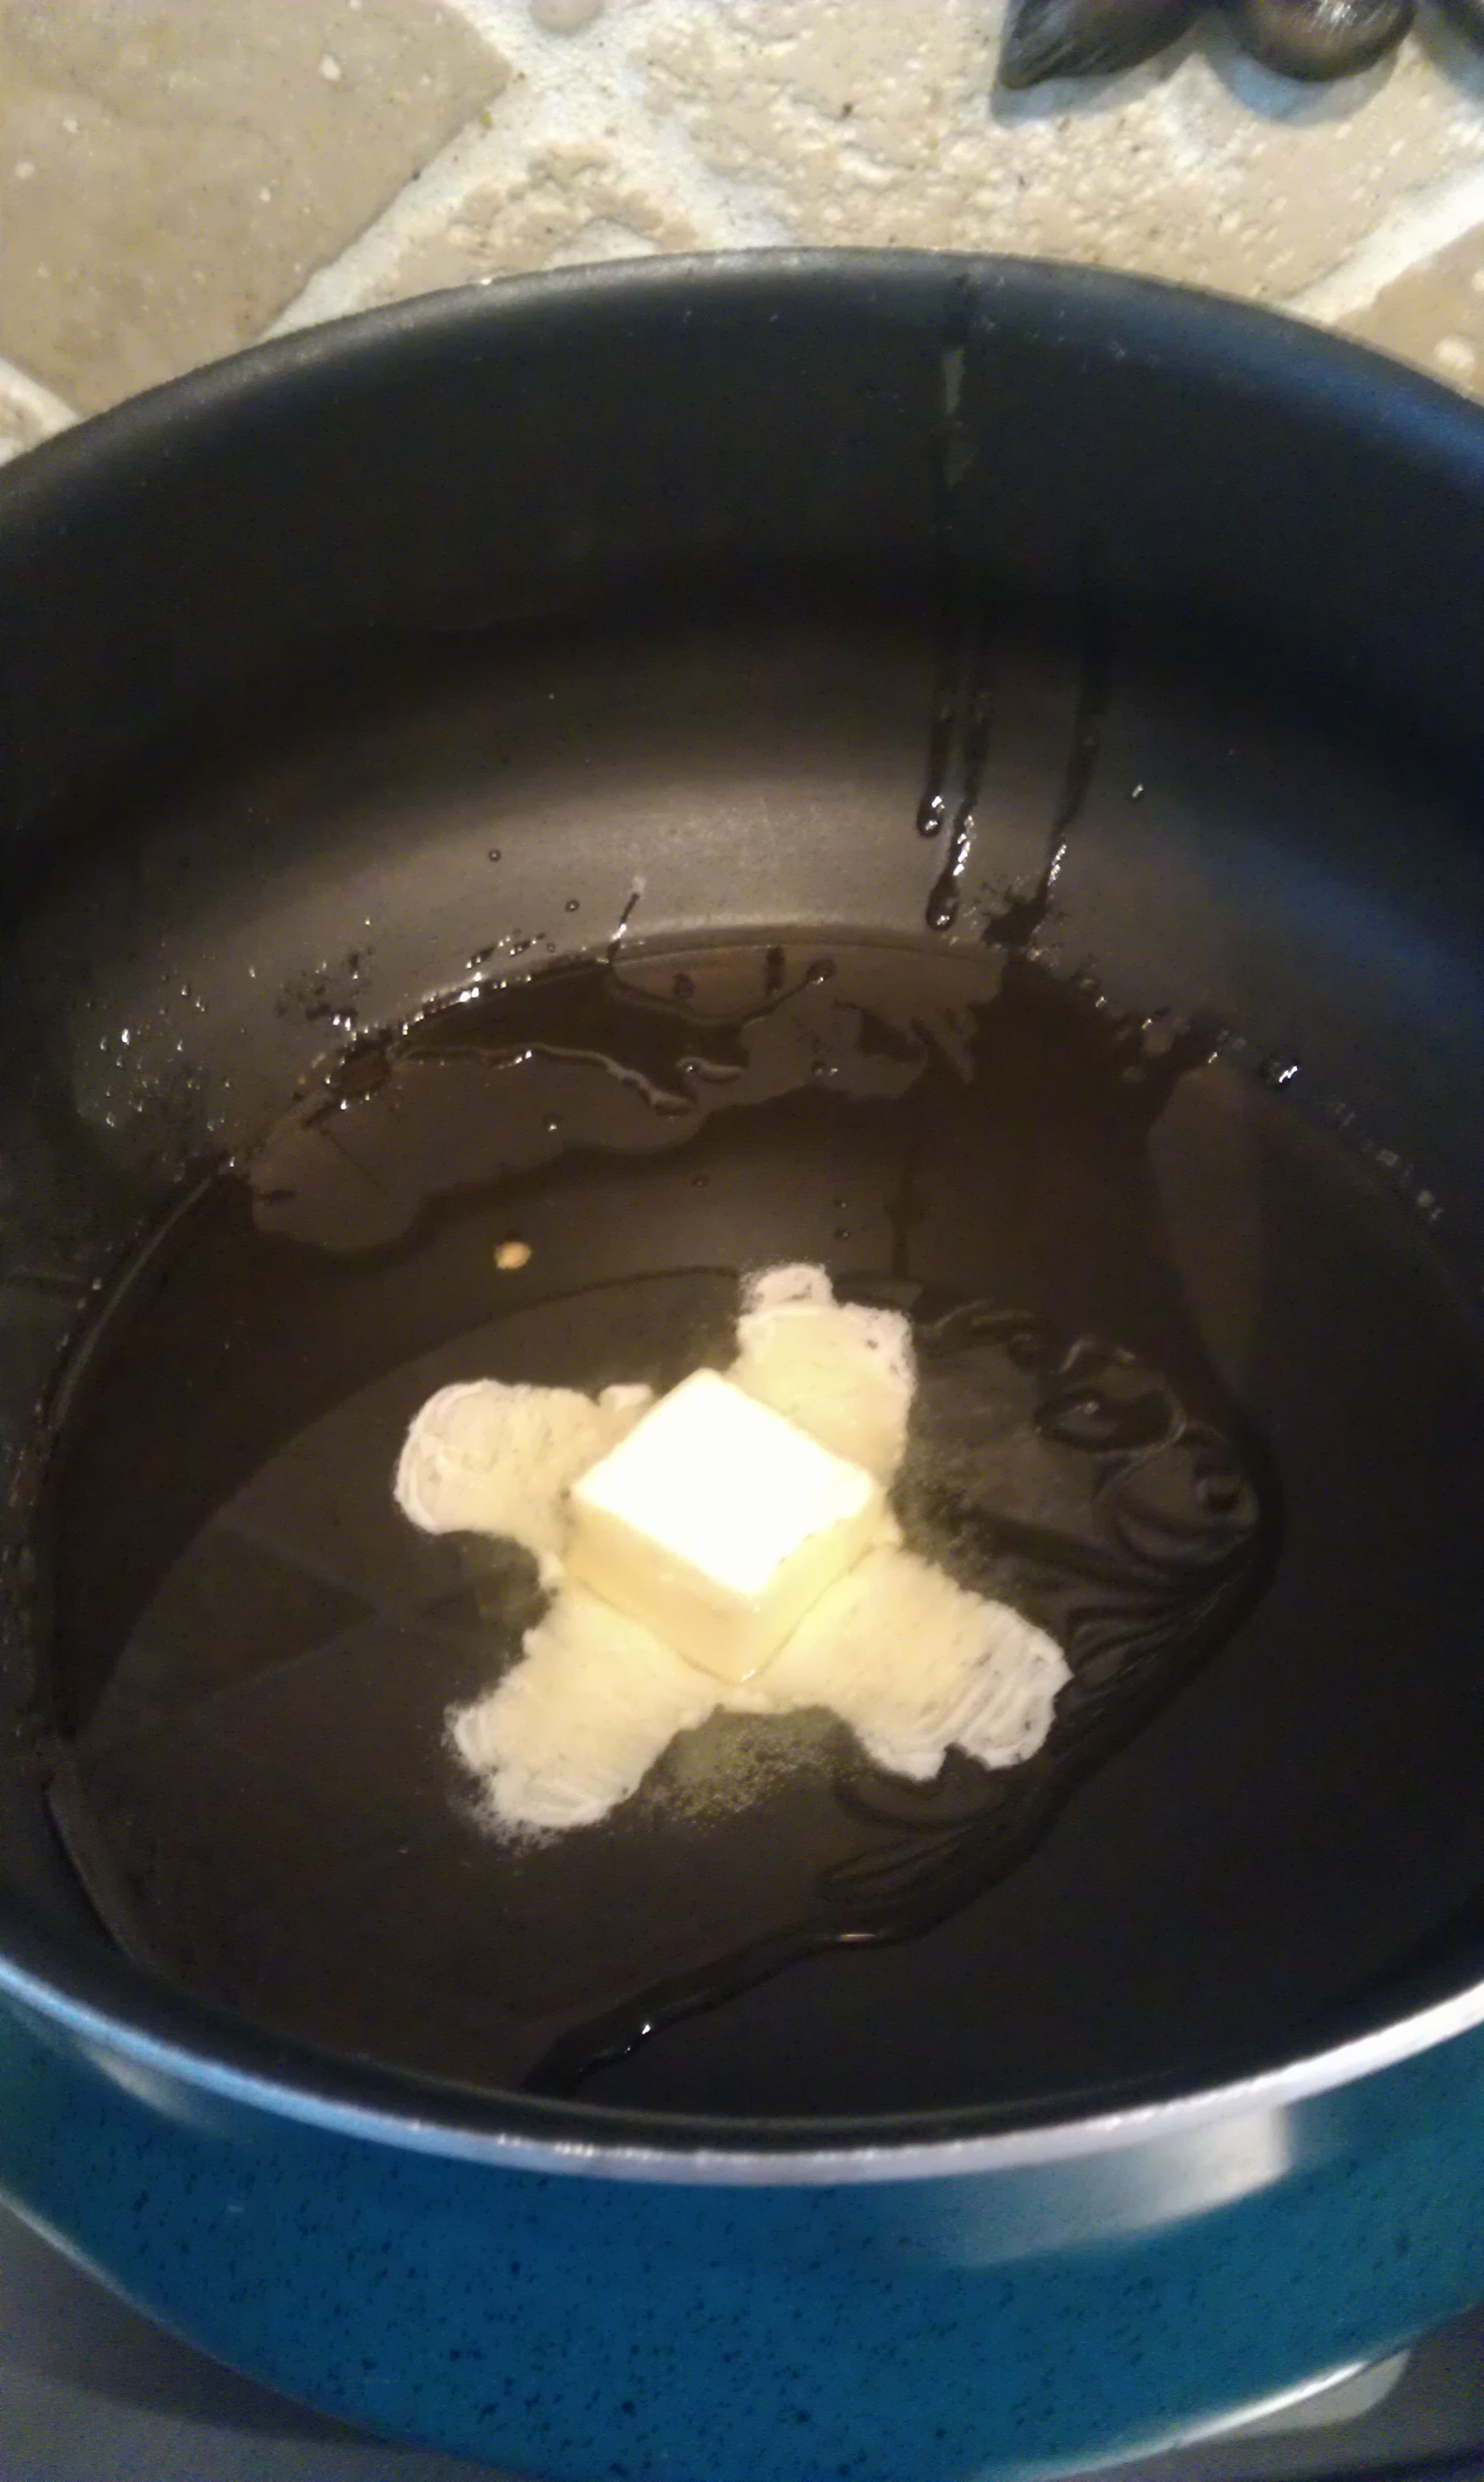
  4. Next take out your wok and turn the heat on to medium. Put some sesame oil in the wok and then add in the chopped shallots, ginger, and mushrooms. Also add in the pinch of chili powder.  Stir the ingredients in the pan for about a minute in the pan before you add in anything else.
  5. After that throw in the little neck clams into the wok with the shallots and mushroom. Let the mixture simmer in the water until it comes to a rolling boil. Allow the clams to cook in the boiling water. Allow the clams to simmer for 3 to 7 minutes. The clams should begin to open up on their own in this time period. If any of the shells have not opened after 7 minutes discard them because this means that the clams aren’t fresh enough to eat.
2015-03-23 18.52.21 - Copy

This is how they should look after the clams have boiled.

6. Once the liquid has boiled and most of the clams have opened up add in the coconut milk and wait for the mixture to come to a boil again.

7. Add in the cilantro and the 3 cups of Tamarind Chili sauce and stir into the pot until the sauce dissolves into the liquid soup. Wait until the sauce comes up to a boil again.

8. After the sauce has boiled, add in the entire can of coconut milk, and mix it in. Just as a note: coconut milk and coconut crème are two different things. Coconut crème is too thick to be used in in this dish, and it will not dissolve to form the soup, so make sure that you use the milk.

9. Allow the mixture to continue to cook until the rest of the shells open for about 3 more minutes then turn off the heat.

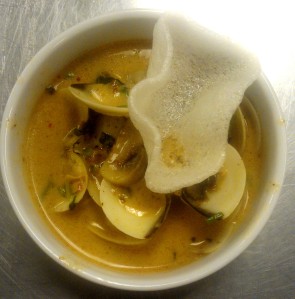
10. Put the soup in a bowl and top it with a rice cracker and serve. You can also pour this soup  on top of some steamed rice and eat it like that. Bon apetit!

2015-03-23 19.02.29 - Copy

This is how your soup and clams will look like when they are done! Delicious!

Fresh Lobster Spring Rolls

Spring rolls. Who doesn’t love spring rolls? I for one consider them to just be a healthier version of burritos, but I may be the only one. When people typically think of spring rolls the first thing that comes to mind for many are the fried spring rolls with the crunchy golden wrappers that one would often get when ordering Chinese takeout.  While I am a huge fan of that type of spring roll, there is another healthier type that is preferred in my home, especially by my pescatarian parents.

2015-03-23 17.58.35 - Copy

This version uses a tapioca sheet as the shell or outer layer instead of a crunchy pastry wrapper. What the heck is a tapioca sheet you may ask? Well that is a good question. Prior to learning this recipe in my culinary class I had never heard of them either. Tapioca sheets are also sometimes referred to as “Spring Roll Skins”,  They are made from tapioca starch, rice flour, salt, and water. The great thing about this product is that is gluten-fee. The flours are combined and then dried for preservation and they have the texture of a thin plastic plate. When you use them you will revitalize them by soaking them in water, and then they will become stretchy and sticky kind of like seran or plastic wrap. They are just a flat paper-like version of the tapioca balls that are found in bubble tea or in puddings.

Tapicoa sheet

This is how these sheets look like when they are in the packaging, and when you take them out of the packaging. Notice the crisscross textured pattern on it.

So shall we get started with today’s recipe? The fresh lobster spring rolls that we will be learning how to make today are a wonder addition to a lunch box or just as a healthy snack. I really love snacking on them after a work out. So here we go!


Fresh Lobster Spring Rolls 

Ingredients: 

– basil
– mint
– costal lobster
– cucumber
– cilantro
– mixed greens
-tapioca sheets/ spring roll skin

Supplies: 

– cutting board
– smooth dinner plate
– large bowl filled with clean cool water
– vegetable peeler
– knife

Directions: 

1) First gather all of your cooking supplies.

2015-03-23 17.19.26

2) Fill up your bowl with cool water from the tap and make sure that your dinner plate is smooth with no textures on it to prevent the tapioca sheet from sticking to it when it is wet.

Fill up a large bowl with clean water.

Fill up a large bowl with clean water.

3) Get your cucumber, peel it, and cut off the sides of it removing the seed core in
the center. Toss the core. Take the sides of the cucumber and cut them into match
sticks.

Cut your cucumber into matchsticks.

Cut your cucumber into matchsticks.

4) Gather the rest of your ingredients and chop them into bits so they can fit more easily on the inside of your roll later. Make sure that you remove the stems from the mint and basil
first, before you start cutting. It doesn’t matter how much of each item that you uses. It all depends on your personal preference as to how many rolls you want to make and how much you want to stuff them. If you cut up too much you can just make it into a miniature salad.

You also have the option of not chopping the vegetables up into bits and instead just slicing everything into long strips and putting them into the roll that way. Either way you choose to do it is fine. It will only cause a difference in the texture of the roll when you are eating it.

Gather all of your ingredients.

Gather all of your ingredients.

Chop up all of your ingredients.

Chop up all of your ingredients.


5) Next you want to take your dehydrated rice wrapper,or tapioca sheet ,and dip it into your bowl of water for a few seconds to re-hydrate it. Be careful not to over-soak it or the sheet will become overly sticky and rip when you are trying to make your wrap. You really just want to get it damp. The best way to do this without overdoing it is to just to drag it along the surface of the water in one swoop making sure to get both sides of the sheet wet. Or you can just drop it in the bowl and immediately take it out, It should still feel hard and firm when you get it out of the water, but don’t worry it will continue to soften as you work wit it. Then gently shake off the excess water droplets.

Tapicoa sheet

DSC_0642 (1)

Quickly just get the entire tapioca sheet damp. then take it out of the water immediately and shake off the water.

6) There are two sides of the sheet. One side is smooth and the other is rough and textured. After you shake off the excess water place your sheet on your smooth plate with the rough-side facing up. You can then begin to place your chopped up ingredients on top of the sheet including the lobster, just like you would do when you are stuffing a taco.

2015-03-23 17.54.21

Add in the vegetables and lobster.

2015-03-23 17.54.39

Roll it up like a taco.

7. Repeat this process several times until you have the desired amount of spring rolls. It is okay if they look like they are a bit inconsistent in size and shape. With practice this should go away.

2015-03-23 17.56.52

See my rolls are various sizes.

8. Finally you last step is to cut the rolls in half diagonally, then plate them however you desire. You can serve these rolls with sweet chili sauce, Japanese peanut sauce, or hoisin sauce on the side to dip it in.

These are best eaten immediately after you make them.You can keep these in the refrigerator for a day or two after you make them. I wouldn’t recommend consuming them after that because the rice wrapper will get dry again.

Let me know how it turns out!

Bon apetit!

2015-03-23 17.58.35 - Copy

2015-03-23 18.09.13 - Copy

Crunchy Deep-Fried Risotto Cake Fries and Sesame Crusted Seared Albacore Tuna with Chili Mayo Sauce

Hello all! I hope that you are doing well this evening! I am so excited today to be sharing these recipes with you all! This is my favorite dish combination that I learned how to make in the past few months. Today, I am going to share with you all  three, yes three, recipes for : Crunchy Deep-Fried Risotto Cake Fries, Sesame Seared Albacore Tuna, and Chili Mayo sauce. These dishes are much easier to make than they sound. They make a nice, quick,& easy, yet fancy dinner for a night in. It will definitely impress your loved ones and dinner guests.

2015-02-23 19.10.05


Crunchy Deep-Fried Risotto Cake Fries 

Ingredients: 

– Ready made frozen lobster risotto

– Panko Bread Crumbs

– White flour

– Eggs

– Oil to fry the cakes in

Supplies: 

– Knife

– Bowl

– a pot with oil or a deep fryer

Directions:

If you remember a few weeks back I had a post about how to make an Asian lobster risotto. At the end of that post we ended up with this:

2015-02-09 18.25.50

The lobster risotto

If you don’t remember how to make this risotto no worries! You can find the recipe here:  https://mariamhhanna.wordpress.com/cooking/

After I finished making the risotto  and used a bit of it for that recipe I put the rest of it into a glass pan and stuck it in the freezer so I could use it at a later time.

rice pudding 014

The frozen risotto in a pan.

1. The first thing that you want to do is get your frozen risotto out of the freezer and cut it up using a sharp knife into mini “cakes” about the size of a mozzarella cheese stick. Try to cut them evenly. You want to do this quickly so your risotto doesn’t melt.  If it melts it will be very hard to deep fry because the mixture will not hold it’s shape.

2015-02-23 18.34.55

Here are the mini sticks of the risotto that I cut. Each is about the size of a Jenga block.

2. After you cut your risotto into the blocks. First coat the risotto cakes in plain dry white flour. You want to make sure that it is covered in flour so the egg wash from the next step will stick to it.

2015-02-23 18.35.56

Cover the cakes in white flour.

3. Next you want to make an egg wash by whisking a few eggs together until they become liquid like. Make sure that the yolks and whites are completely mixed.  After that dip your flour coated cakes into the egg wash and make sure that they are completely covered in egg. You want it to be covered well with the eggs so the panko bread crumbs from the next step will stick.

2015-02-23 18.37.04

After the egg wash it should look like this. It is okay if a few bits of flour are peeking through.

4. Then pour some Panko breadcrumbs onto a plate and cover your cakes in it. When you are doing this step, press the crumbs into the cake using your fingers so they will stick. You want to try to get as much of the breadcrumbs as possible on there because they will form the crispy outer layer of the cakes when they are fried.

2015-02-23 18.41.42

Covered with the Panko breadcrumbs.

5. The last step is to deep fry your cakes. You can use an industrial grade fryer or you can just put oil in a pot at home and deep fry them in that. It is best to use canola oil for this.Pour the oil into your pot or fryer and turn on the heat. Wait until the oil is approximately 165 degrees Fahrenheit before you drop the cakes in so that way they will cook thoroughly. Remember that the cakes are partially frozen on the inside still. Once the oil is hot, drop the cakes in, and let them fry for 3 to 4 minutes or until golden brown. When they become that color take them out of the fryer, let the excess oil drip off for a few moments, and then serve immediately while they are still hot.

Note: You do not have to cut the risotto up into mini cakes. You can also cut it into a large block and deep fry that. It will just take awhile longer in the fryer to cook.

2015-02-23 18.45.09

This is how they should look when they are done in the fryer.

2015-02-23 18.45.44

This is how they will look like when they are done. Yummy right? They kind of look like fish sticks.


Sesame Crusted Seared Albacore Tuna 

Ingredients: 

– Raw Albacore Tuna

– Raw Untoasted Sesame Seeds

– Italian Seasoning

– Crushed Red Pepper

– Powdered Garlic

– Salt

– Canola Oil to fry the Tuna in

Supplies: 

– Frying Pan

– Stove

Directions:

The second part of our dish today is sesame crusted seared tuna.

1. Get out your frying pan.

2015-02-23 17.57.15

2. Make a dry rub to coat your piece of tuna by combining: raw sesame seeds, Italian seasoning, red pepper, garlic, &     salt. You want to have an equal ratio of all of the parts ( for example 1:1:1:1:1).  Pour the dry rub mixture over the tuna in a plate. Use your fingers to press it into the fish. It should stick to the fish easily. Make sure to cover all of the exterior of your filet. We will pan sear this rub into the fish and it will make a nice crunchy exterior.  Once you are done coating it set it aside for a moment.

2015-02-23 18.03.45

3. Next you want to get out a frying pan. Pour in enough canola oil to coat the entire bottom of the pan. Turn on the stove to a medium heat. Wait until the oil begins to simmer, then drop in your piece of tuna.

2015-02-23 18.05.47

2015-02-23 18.08.56

4. Sear each side of the tuna until the seeds on that side become a golden brown color, then flip it onto another side. If you overcook a side, the sesame seeds will burn and will taste bitter.To avoid this once the seeds on the bottom become golden brown, flip it over.

2015-02-23 18.10.13

5. You can also tell by looking at the sides that the “cooked” tuna becomes white vs. the pink rare inside. Try to cook each side evenly. You can tell this just by looking at the color from the side. Tuna is a mild fish. Make sure that once you start to cook it that you don’t cook it past medium or it will become too dry. After all of the sides are cooked evenly remove the fish from the pan, transfer it to a cool plate, and allow it to rest for a while before you attempt to cut into it so it will remain juicy, and it will be easier to cut. After it rests it is ready to eat!

2015-02-23 18.11.38

Disclaimer: Just a note about using Albacore Tuna. Make sure not to overeat this type of fish. Albacore Tuna has a very high mercury content and eating too much of it will put you at risk for mercury poisoning. So indulge yourself with this recipe on occasion, but do not over-indulge.


A condiment that pairs nicely with this dish is chili-mayo sauce. In the pictures below it is the orange sauce on the plate. This is a quick, easy sauce to whip up and it makes for a nice dipping sauce for both the risotto fries and the tuna.

Chili-Mayo Sauce


2015-02-23 18.58.22 - Copy

Ingredients: 

– 6 tablespoons of Japanese Mayo

– 1 teaspoon of Sweet Chili Sauce

– 1 teaspoon of Normal hot chili sauce

Supplies: 

– bowl

– spoon

Directions: 

1. Combine all of the ingredients in a bowl. Mix together and serve immediately. Can be stored in an airtight container in the refrigerator for about a week.


When I was plating this dish I used some pea sprouts and sliced radish as garnishes, along with the orange Chili Mayo Sauce on the plate.

2015-02-23 19.10.05

2015-02-23 19.09.55

2015-02-23 19.10.13

2015-02-23 18.58.08

Bon Appetit! Let me know how it turns out in the comments! If you have any questions at all please let me know in the comments! I’d be happy to answer them!

Crispy Fried Egyptian Cauliflower

2015-03-14 20.20.27

Ingredients:

  • 2 heads of cauliflower
  • 1 cup of flour
  • 1 tablespoon of salt,
  • 1 tablespoon of cumin
  • 1/2 teaspoon of black pepper
  • 1 clove of grinded up garlic
  • ½ cup of cold water
  • canola oil ( enough to deep fry the cauliflower)
  • breadcrumbs

 Directions: 

1. Separate the cauliflower into big chunks with a knife.

2015-03-14 19.36.59

2. Put the cauliflower in a pot with enough water to cover it, 1 teaspoon of cumin and 1 teaspoon of salt and bring to a boil. Boil until the cauliflower is soft but not mushy on medium heat.

2015-03-14 18.45.09

This is how it looks like when you first put it in the water. The color is opaquely white.

2015-03-14 19.36.50

This is how it will look like after it has boiled. Notice that it is a bit translucent and not as bright a white.

3. Next prepare the frying batter. For the batter mix 1 cup of flour, 1 spoon of salt, 1 spoon of cumin, 1/2 teaspoon of black pepper, and 1 clove of grinded up garlic. Add in ½ cup of cold water and stir the mixture with a fork until it becomes a batter.

2015-03-14 19.44.23

This is how the batter will look after you have mixed all of the ingredients together.

4. Remove the cauliflower from the pot and put into a colander and drain the water from it. Afterwards lay them put out on a flat surface.

2015-03-14 19.40.19

5. Lightly sprinkle the cauliflower with salt and pepper.

2015-03-14 19.41.196. Then take the cauliflower, dip it into the batter, and roll it in the batter until the surface of the cauliflower is completely covered.

2015-03-14 19.51.28

2015-03-14 19.51.39

Make sure the batter is covering all of the cracks and crevices.

7. Get a shallow plate and fill it with breadcrumbs. After that roll the battered cauliflower into the bread crumbs.

2015-03-14 19.52.11

2015-03-14 19.52.21

Make sure to cover both sides with the bread crumbs and press them on a bit with your fingers so they stick to the batter and do not fall off.

8. Get a large deep pot that is safe to fry in. Pour in enough canola oil so that your cauliflower will be completely submerged in it.  Turn on the heat to high and wait until the oil is at a rolling boil. It is important that your ol is very hot so that the  cauliflower will cook thoroughly.

2015-03-14 20.07.26

This oil is not hot enough.

2015-03-14 20.07.32

This oil is the right temperature.

9. Once the oil is hot, drop in the cauliflower a few large pieces at a time. Let the cauliflower fry until it is golden brown.

2015-03-14 20.07.39

This is how it looks right after you drop all of the cauliflower in.

2015-03-14 20.08.31

This is how it will look when it is about halfway done. See it is starting to turn golden brown.

2015-03-14 20.10.49

Now you can tell they are done because they are a golden brown color.

10. Once the cauliflower is golden brown, take out of the pot using a ladle so you won’t break it with a fork, and so you wont scoop up excess oil. Then set it onto a paper towel to drain the oil and cool off for a minute.

2015-03-14 20.17.59

2015-03-14 20.10.59

11. You are done now! That’s all there is to it! Serve immediately while it is still hot with toasted pita bread, tahini sauce, and a pinch chili powder for an added kick if you want.

2015-03-14 20.15.15

2015-03-14 20.20.27

Egyptian Red Lentil Soup: Yatz

Hello all! I have decided to mix things up and share with you all a dish from my culture. If you don’t know it already I happen to be Egyptian. One of my favorite foods when it is cold or rainy out is Egyptian Red Lentil Soup, or “Yatz” in Arabic.

Lentil_Soup

I recently made this dish for a dinner party where All three of my guests were strict vegetarians. It was a big hit with them. They devoured every last drop of the huge pot I made in this post in just one sitting. So I thought that if these three non-Egyptian friends of mine were so enamored with this soup, that it might be best to spread the love even further and share it with all of you as well!

2015-03-11 13.13.53

Ingredients:

  • 3 roma tomatoes
  • 2 thick carrots
  • 2 white onions
  • 2 tablespoons butter
  • 1/2 teaspoon Cumin
  • 3/4 teaspoon Salt
  • a pinch of Pepper
  • a pinch of chili powder
  • 5 cups water (not pictured)
  • 1 cup red lentils
  • 1 clove of Garlic ( mine in that picture has been pureed)
  • 3 Tablespoons of Olive Oil

2015-03-11 13.15.12

You will also need: 

  • a large pot
  • a blender

Cooking Directions:

2015-03-11 13.27.381) Wash, peel , cut all the vegetables, and drain.

2) Put the lentils in a colander and fully rinse off. Wash the lentils multiple times until the water is no longer cloudy.

This is still cloudy. You need to continue to rinse the lentils until the water  is clear.

This is still cloudy. You need to continue to rinse the lentils until the water is clear.

2015-03-11 13.30.16

If you can see on the right that the water is clear. After I rinsed it I drained the water and left it in a strainer for a few minutes until the water dripped off.

3) Go to the huge pot that you will use on the stove. Turn the heat on to medium.Add in the spoons of oil first. Then add in the butter and wait until it completely melts and stir them together.

2015-03-11 13.32.40

2015-03-11 13.34.32

2015-03-11 13.34.524) Heat the oil until you can feel the heat it gives off when you put your hand above the pot. Then add in the chopped onions and sautee until the edges on the onions are golden.

2015-03-11 13.36.20

2015-03-11 13.45.245) Add in the lentils, 5 cups of water, and the rest of the chopped vegetables. Stir the pot so that everything is evenly distributed throughout the pot.

2015-03-11 13.46.28

2015-03-11 13.46.512015-03-11 13.47.276) Add in all of the spices and garlic and stir the pot again.

2015-03-11 13.48.12

2015-03-11 13.48.397) As soon as the mixture boils , set the the heat to “low”.

8) Stir the mixture again to ensure that it doesn’t stick to the bottom of the pan.

9) Let the soup stay on the heat for 15 more minutes stirring constantly so it doesn’t stick to the bottom or burn. You will know that it is done when you can pierce the carrots with a fork and they are soft. If after 15 minutes the carrots are not soft, then wait until they are done before you proceed to the next step.

2015-03-11 13.49.20

After awhile on the heat the water will get cloudy and the color will dull.

2015-03-11 15.38.10

This is how it will look after 15 minutes.

10) Once the carrots are done, turn off the heat, and put the soup in the blender. You want to do this while the soup is still hot so it will blend smoothly. Turn the blender on high and leave it on until the soup is blended smooth. During this step you can adjust the soup to make it thinner if you like by adding in some more water.Once it is smooth, pour it back into the pan, and bring it to a boil again if you added more water into it. If you did not add water into then it is ready to eat!

2015-03-11 15.39.21

Before

2015-03-11 15.39.51

During

2015-03-11 15.41.03

After

2015-03-11 15.42.16

See it became a liquid soup!

2015-03-11 15.43.17

It’s done!

11) Serve with lemon, vinegar, onions, pepper, salt, and toasted pita bread.

Lentil_Soup

12) You may store the leftovers in the refrigerator for up to a week. Or you may freeze it and it will keep for a few months. To reheat, you can heat up in microwave or on the stove. You also may add more  water to better regulate the thickness of the soup as it gets older. Enjoy!

Easy Beginner’s Homemade Sushi

2015-02-16 21.57.49

Supplies:

  • a sharp knife
  • a cutting board
  • a tatami mat – You can buy it at H-mart
  • Hangri or  large bowl for mixing the rice
  • flat surface
  • plastic wrap
  • ice
  • ice water
  • a large bowl

Ingredients:

  • cooked sushi rice
  • water
  •  6 cups rice vinegar
  • 4 cups of sugar
  • 1 cup of salt
  • You can buy sushi flavoring packets with toasted sesame seeds to “decorate” the outside of the sushi at Hmart
  •  spicy mayo
  • roasted seaweed- Sakura premium brand from Hmart
  • Egg made into a sweet egg roll
  • 1 ripe avocado
  • 1/2 cucumber
  • imitation crab sticks
  • cooked shrimp
  • smoked salmon

How to prepare the sushi making supplies:

  • First grab a sushi mat and wrap it twice in plastic wrap. Make sure that you wrap it tightly. After you wrap it, slide it against the side of a table to get the air out.
  • Hangri– giant rice mixing bowl. It is made out of cedar wood. Cedar wood is a wood that has the ability to fight bacteria.It is not lacquered. It is bound by copper bands.Before you use it you need to wipe the hangri with cold water. You don’t use hot water because the heat makes the wood expand and contact  and it damages the bowl. You need to let the hangri sit and let the water soak on it for 5-10 minutes.

Preparing the rice:

It is best to prepare the sushi rice ahead of time. Make sure that you are using sushi rice, and not regular rice, because sushi rice is stickier, and you need this stickiness to hold the roll together.

  1.  To cook the rice, the best ratio is 1 part rice to 1.5 parts water ( 1:1.5). First rinse the rice 3 times to remove the starch. You need to rinse the rice out because if you don’t it will become overly sticky and mushy.
  2. Cook the rice in a rice cooker. Once the rice is cooked, let it steam for 20-25 minutes.
  3. After the rice has steamed for the allotted time, remove from the rice cooker and put into a large wooden bowl or a Hangri.
  4. Now you need to mix the rice with: 6 cups of vinegar, 4 cups of sugar, and 1 cup of salt.
  5. First sprinkle in the vinegar on the top of the rice and work it into the rice. The ph level, or acidity, of the                 mixture should be between 4.2- 4.6. Anything over or under this will be ineffective.
  6. After the vinegar is semi-soaked up by the rice add in the sugar and the salt.
  7. Do not stir the mixture or you will mash up the rice. Instead you want to “cut” the liquid into the mixture by             moving your wooden spatula back and forth. This cutting motion is called “Shanigiri”. This also helps the rice to       cool down.
  8. If you see any clumps of rice make sure to “cut” them open.
  9. After you are done cutting the rice, allow it to sit for 5 minutes so it can fully soak up the liquid you put into it, and so it will not be too mushy when you begin to form it into the sushi.

Preparing the shrimp:

While many people tend to think that sushi is synonymous with “raw” fish. This is not always the case. In fact the fish is usually cured, smoked, or prepared in someway.

  1. To cook the shrimp first you need to boil a pot of water with some salt in it.
  2. If you look at the shelled raw shrimp and you will see an opening between the shell and the meat. Then insert a bamboo skewer into it, making sure that the shrimp it as straight as possible, and break off the tip. You want your shrimp to be straight so that way it will lie flat on top of your rice.
  3. To cook the shrimp first you must boil a pot of water with some salt in it. Take your skewered shrimp and drop it into the pot of salted boiling water. Be sure to stir the shrimp while it is in the pot so it will cook evenly. You will know that the shrimp is cooked when it floats up to the top of the pot. The second way of knowing whether or not your shrimp is cooked properly is that raw shrimp is translucent; if the shrimp is opaquely white then it is fully cooked. Be careful though, if the shrimp is too white then it is overcooked and it will have a rubbery texture.
  4. Once the shrimp is cooked, quickly toss it into a bowl of ice water to shock it. The cold water stops it from continuing to cook when it leaves the pot. This will prevent it from getting overcooked. At this point you want your shrimp to be soft, but not rubbery texture-wise. Let the shrimp sit in the water for 1 to 2 minutes. You want the temperature of the shrimp to drop to around 60°F. Do not let it get cooler or the shrimp muscle will tighten up and then it will taste like rubber.

How to prepare to make Sushi:

-1 Wrap up your tatami mat with plastic wrap so that way the rice doesn’t stick to it.

2015-02-16 17.14.42

-2 Gather the Sushi Ingredients

2015-02-16 18.05.26

-3 Peel & cut the vegetables.

2015-02-16 18.30.24

-4 Make the Tensu liquid:  The liquid is one part vinegar and one part water. You need to dip your hands into the mixture as you roll your sushi because it prevents the rice from sticking to your hands. This is what makes up the unique taste in sushi that you can’t quite put your finger on.

How to prepare the vegetables you are going to use in your sushi:

– when you cut the cucumber you want to:

  1.  peel it
  2. cut it lengthwise into long “logs”
  3. scrape the seeds out
  4. cut the cucumber into little matchsticks
  5. When you are done cutting your cucumber, make sure to rinse it off before you start using it.

– you want the avocado to be ripe and mushy.

To cut the avocado:

  1. First cut of the bottom of it so it will have a flat bottom, so it will not roll away when you try to cut it.
  2. Cut the avocado in half and discard the stem and seed.
  3. While the avocado is still in the shell slice it thinly. Then scoop it out of the shell using your knife by severing it in one swift motion.

How to cut the fish:

There are two main cutting motions that you will use for cutting all the parts required to assemble a piece of sushi:

  1. First you will pull the knife back in order to cut the roll in half.
  2. Second you will push forward to cut up the log into individual pieces.
  3. You can use any type of fish, but the best things for a beginner to use are smoked salmon and imitation crab meat.
  4. Cut the fish diagonally. Instead of sawing the knife you need to slice the fish by pulling the knife back. Do not slice against the grain of the fish. Slice with the grain so that way your fish doesn’t rip or get ragged edges
  5. When you get the imitation crab sticks make sure to slice it in half lengthwise so it will be able to fit inside your roll.
  6. Peel the shrimp and cut off the tail before you put it on the sushi
  7. The fish needs to be cut evenly and leveled

How to roll Sushi:

  1.  Cover your hands with the tensu. You want your hands to be damp so that way the rice will not stick to your hand
  2. When you use the tatami mat, the dark flat side needs to be up and in contact with your rice so that way the sushi gets a nice round shape
  3. First lay down your seaweed shiny side down. Seaweed had dimples. The smaller the dimples the harder the seaweed is to control. If you hold it up to the light you will see that it is translucent in a few places. The best seaweed to use is the part that comes from the bottom of the stem because it is the freshest because it is newer. If your dried seaweed is fresh it should snap when you press down on it. Seaweed has two sides: The dull side and the smooth shiny side. You want to make sure that the dull side is put facing your mat so it will be on the outside of the roll.
  4. First dip your fingers and palms into the Tensu liquid.
  5. Get a ball of the cooked rice; it should be about the size of a tangerine. Begin to press the rice into one flat layer on top of the seaweed from right to left. With your thumb you want to move the rice to all of the corners. Put your hand on the edge of your seaweed as you are spreading the rice out as a guideline to help the rice stay on the seaweed. Make sure that it covers all of the seaweed. Then even out the rice with your fingers.
  6. You can use toasted sesame seeds and sprinkle them on top of your rice. Keep your left hand in front of your seaweed as you are sprinkling the sesame seeds on so that way everything that goes out of bounds will bounce off of your hand and end up on your rice. You don’t want to add too much. Then take your tatami mat and with the flat side down on top of the rice and press it down on top of the rice. This makes your rice adhere to the seaweed.
  7. Take your hand and pick it up and flip your mat over. Now the seaweed side of your sushi should be on top facing you. You want to move your seaweed down 1 inch from the edge of your mat so that way when you roll the sushi up it will be able to close.

2015-02-16 18.38.54

8. Take your avocado, remove the seed and peel off the peel. Avocado is slimy so you want it to be the first ingredient          that you lay down so you will not get your hands dirty.

9. Add your cucumber on top of the avocado.

10. You may add some spicy Korean mayo on top of the cucumber. Make sure though to just add in one straight line. If           you add in more it will mess up your sushi and seep out through the sides.

11.Take your imitation crabstick, pinch it in the middle, and pull it apart lengthwise. Then lay it in on top of your                     avocado, mayo, and cucumber.

2015-02-16 18.39.28

12. Go back to the side of the mat that has the one inch margin. Take your fingers and hold the ingredients so they do           not fall out while rolling your mat forward and over the ingredients. You will then place the edge of your tatami mat             one inch away from the edge of your other side of the seaweed sheet, and push the roll down a bit. Then you want           to open the one inch flap part of the mat that is covering the roll and hold it open as you proceed to roll the roll over.

13. Then squeeze the mat over the sushi to make sure that it is all compressed. While it is still covered with the mat              you can gently push the sides of the roll in to make is even. Unroll the mat so you can see your sushi.

2015-02-16 18.41.48

14. To cut the roll place your knife in the center of your roll. First draw back, and then push forward. And keep doing              this until you get bite sized pieces.


Notes that apply to all sushi making:

You need to have the flat side of the matt up so that way your sushi will be smooth, and the rounded sides on the outside.

– When you are making the sushi you want to squeeze the mat tightly as you roll it up that way your sushi is tighter.

– You also want to press down on the bottom of the roll near the area that is touching the ground in order to give the sushi a “round” shape. If you skip this step it will be square.

– If you do not get enough rice on the bottom of the sushi just unroll it, and add more rice to the area that needed it and roll it up again.

– you want the rolls to be rolled tightly and make sure they are round

– always dip your fingers into the Tensu solution before starting to prepare the sushi so that way the rice won’t stick to your hands.


Nigiri Shrimp:

2015-02-16 21.36.29

  1.  Dip your fingers into the Tensu solution
  2.  First peel the shrimp and cut off the tail
  3. Then cut (score) the shrimp along the bottom so that way it will lay flat on the rice
  4. Next grab the shrimp and lay it down with the white side facing up in your palm on top of a piece of Ceram wrap.
  5. Grab a ball of rice and press it into the shrimp backside.
  6. Make a ball out of the shrimp and squeeze it to secure the rice.

   Inside Out Roll:

2015-02-16 21.46.41

  1.  Dip your fingers into the Tensu solution
  2. Inside out sushi  (with the rice on the outside) is done so that way there is more room to stuff things on the inside of the roll.
  3. After you press the rice down on the seaweed and apply the sesame seeds flip the sheet over so that way the rice is facing down and the seaweed is facing up. Then put the fish and vegetables on the seaweed and roll the roll up as you normally would.


Temari Sushi (Shrimp Ball)

  1. 2015-02-16 21.33.59 Dip your fingers into the Tensu solution
  2.  Peel the shrimp and cut off the tail before you put it on the sush.
  3. First butterfly the shrimp for the shrimp roll.
  4. Next put a piece of plastic wrap in you hand, then place the shrimp belly side up in your palm on top of the plastic wrap.
  5. Now get a ball of rice and put it into the shrimp.
  6. After that you need to bring up the plastic wrap in your hand and twist it so it forms a ball over the shrimp and rice. This is what gives it the round shape.
  7. Finally untwist and unwrap the plastic wrap and you will end up with a round shrimp ball.


                                                                            Rainbow Roll:

2015-02-16 21.39.40

  1. Dip your fingers into the Tensu solution.
  2. To make a rainbow roll first make an inside out roll.
  3. After you make your inside out roll layer your cut fish on top of the rice.
  4. You can then layer in some thinly sliced avocado between the fish.
  5.  When making a rainbow roll you need to put plastic wrap on top of your fish and avocado and then roll it up again so  1) it will not stick to the mat and 2) get round.
  6. 2015-02-16 18.54.49
  7.  Take the round side of an unwrapped tatami mat and place it on top of the ceram wrap.
  8. Squeeze the bottom of the roll to make the sushi come back up to the top. The Ceram wrap will make all of he ingredients stick together.
  9. Keep the Ceram wrap on the roll as you cut it to help hold the roll together. Cut it in the same cutting motion.
  10. Make sure to remove the ceram wrap when you are done.

How to cut sushi:

– Before you cut the sushi make sure to squeeze the roll at the bottom with the tatami mat to make it round or else it will turn out square shaped. While it is still covered with the mat you can gently push the sides of the roll in to make is even.

– To cut the roll place your knife in the center of your roll. First draw back, and then push forward. And keep doing this until you get bite sized pieces.

Mini Tea Paper Cards

2015-03-02 22.17.23

Hello everyone! I hope that everyone is doing well! So Last time I showed you have to make Antique Tea Paper Cards. I know that that stationary set had many steps. Sometimes you want to give someone a handmade card, but you don’t want it to be super hard to to. Well have no fear! Today I will be showing you all a simplified version of those cards. This is going to be fun.

Once again we are going start with a base sheet from out tea paper stack.

2015-02-27 23.44.31

Because these cards are going to be “mini” we are going to fold and cut our 8.5 x 11 in sheet of paper in half width wise.

2015-02-27 09.40.53

Each half sheet can make one card. So then you get two cards out of each sheet of paper.

Next I got a sheet of creme printer paper and I cut it the same way.This sheet will serve as the lining for the inside of your card where you will write your message. You want to add this second layer of paper to make your card more sturdy. You can use any color paper for this. Just get your paper and cut it to the same size as your tea paper and crease it in the middle too.

2015-02-27 09.41.20After that you want to use Elmer’s glue to attach it to the inside of your card. In order to avoid having your card buckle or wrinkle I suggest only putting glue on the edge of each side of the white paper. Then just line it up with the edges of your tea paper and attach it.

2015-02-27 09.42.00

2015-02-27 09.43.39

2015-02-27 09.44.11

Now just attach the other side the same way:

2015-02-27 09.45.08 2015-02-27 09.45.24

When you are done fold the card in half again so you can see where the crease is. 

2015-02-27 23.44.31

Now you want to attach your pre-pressed dried flower to the paper using matt medium or white Elmer’s glue. Don’t be shy with the amount of glue that you use. The more the better because you don’t want the flower to ever come off the page. I Used a paint brush to help cover everything easily.

2015-02-27 09.42.10

Make sure to brush BOTH sides of the flower with the glue.  When you are done and you know that the flower is firmly attached to the paper cover the top  of the flower with a few extra layers of glue so that way the delicate petals and leaves won’t break. When the glue dries it will be clear and it will form a protective layer for the flower.

2015-02-27 23.50.44 2015-02-27 23.51.122015-02-27 23.50.56

Now you want to wait for the glue to dry completely. I just left them to dry overnight on my desk. In the morning they looked like this

2015-03-01 17.38.09 2015-03-01 17.38.25

The next morning after I made sure the the glue had dried, I went in and I added a layer of clear liquid varnish on top of the glue. This made both of the flowers very shiny and lovely looking.

2015-03-01 17.39.07 2015-03-01 17.39.27

After the varnish had dried. I went in and used a gold permanent marker to outline the edge of the card. I used a ruler so I could get the straight edges all the way around. After I finished the border I used the same marker to outline the flowers on the page as well as to highlight the individual petals.

2015-03-01 17.53.56 2015-03-01 18.03.01

And that’s it! Your card is read to go after that! All you have left to do is to find an envelop to stuff it in so you can mail it to a friend. Don’t worry the flower will survive the mail and it won’t crumble.Let me know how they like it if you end it sending it to someone!

2015-03-02 22.17.23

Antique Tea Paper Cards

So a few weeks ago I had a post showing you all how to make antique paper using tea. If you missed it you can find it here: https://mariamhhanna.wordpress.com/category/art-2/stationary-art/

At the end of that process this is the paper that we ended up with:
2015-02-07 14.17.41

This week I am going to share with you how I use these sheets of paper to create various types of hand made cards. You can really do anything with this paper. Some things I like to use it with are watercolors, colored pencils, markers, dried flowers, glitter, metallic watercolors, and matte medium.

To start I usually first decide what size I want my card to be. You can either fold this standard printer paper sized sheets    ( 8.5 in x 11 in ) either in half or in fourths depending on the size card that you want. Try to keep the more heavily dyed side facing upwards. After you have creased your paper in half evenly. You can either use use decorative scissors to make the edges ragged or you can burn them with a lighter.

2015-02-05 18.06.30

After you have cut all of the edged of the sheet with the scissors you can use a light wash of brown watercolor  paint to darken the edges. Try not to use too much water or it will cause your paper to wrinkle.

2015-02-05 18.06.43

2015-02-05 18.08.28

Give it a moment to dry then once it is dry to the touch you can go back and use a darker brown marker to outline the edges of the paper so you can have an added layer of depth. This also accentuates the design that you made with teh decorative scissors and it makes it pop out. Make sure that you go all the way around.

2015-02-05 18.22.31

2015-02-05 18.22.38

After I finished outlining the sheet with the black marker I set is aside. This is where you will write your letter.

Next I  got a full sized sheet of creme or tan colored paper and I glued it to the back of the tea paper sheet with a glue stick so it would form a border around it. This step is necessary to make your card more sturdy so it won’t be flimsy. You can also just glue it on to another sheet of the tea paper. Make sure that when you do this that you put the glue around all of the edges so the paper doesn’t peel off.

2015-03-12 21.15.16

2015-02-05 23.22.39

After you have glued the two sheets together you need to flip the page over on to the back so the side with the creme sheet is facing you.

2015-03-12 21.15.16

I had previously taken a second sheet of the tea paper and burned the edges with a lighter. You want to think of this sheet as a “book jacket”. It will be positioned on the outside of your card. When the card is folded they will make up the front and back covers. The from cover is on the right side while the back side makes up the left side. First I folded the sheet in half and lined up that crease with the crease of the other side of the card. Then I attached a dried flower to the front of it using matte medium and then adding a layer of clear varnish on top of it to make it shiny.  I just happened to write the rest of my letter on this sheet already. You don’t have to have to have written on the sheet before you glue it on.This is how that second sheet looks on it own:

2015-02-06 00.07.12

You need to fold this sheet in half again so you can align the creases again.. Attach the jacket to the back of the creme sheet that has the tea paper with the border on it using either liquid glue ( like the ones that school kids use) or a glue stick.  This is how it should look once it is attached:

2015-02-06 00.11.46

When you fold it in half this is how the front cover of your card will look like:

2015-02-06 00.12.36

This is how the back cover of your card will look like:
2015-02-06 00.12.45

Now if you are happy with the way your card looks right now as it is that is fine! ( You should be very proud of your hard work! If you want to add some extra pizzazz to it or give it a more rugged and antique look You can use brown watercolor paint, metallic watercolors, and crayola markers to tone the cream sheet like this:

2015-02-07 14.20.02

2015-02-07 14.30.17

2015-02-07 14.30.38

Finally I went in and I used these Sargent Art Liquid Metals Metallic Fine Tip Markers from Hobby Lobby to add some more sparkle to your card. I went in and used it to outline my flower on the front cover.

2015-02-07 14.30.17

And there you have it! Your very own handmade antique cards! You can make a new one whenever you feel like mailing one out, or you can make a stack of them ahead of time to keep on hand for any time you want to give some one a personalized card!  I know personally from the reactions that I have gotten from my friends and pen pals that these cards are usually well received and cherished.

Good luck and let me know in the comments if you have any questions!

How to prepare salmon for use in your kitchen

three salmon pieces on white background

Ever look at a piece of fresh salmon at the store and wish you could take it home and eat it? Ever walk away from the counter because you are taken aback at having to deal with a piece of raw fish? Worry no more! Look here to see a few tips I learned about how to take care of the salmon that you bring home from the store! Look here in Culinary !

Pan Roasted Salmon & Udon Noodle Pesto With Salmon Caviar                                                                   2015-02-09 19.40.27

Check out how to make simple and delicious pan roasted salmon, with pesto udon noodles, and salmon caviar in culinary!

Link

Previous Older Entries

Enter your email address to follow this blog and receive notifications of new posts by email.

Follow A Little Spark of Madness on WordPress.com

Blog Stats

  • 499 hits
L I K E - I N - M E X I C O

Mexican food , Traditions and Mexicanadas

Thought Catalog

Thought Catalog is a digital youth culture magazine dedicated to your stories and ideas.

The Research Whisperer

Just like the Thesis Whisperer - but with more money

life gets messy.

no need to cry about it.

I am a feminist

Because it shouldn't be a dirty word...

Knifey Spoony Things

It's all fun and games, until someone loses a fork....

The Thesis Whisperer

Just like the horse whisperer - but with more pages

Kitchen Mason

Making your life easier, one recipe at a time!

Sabers & Sensibility

The personal blog of Elaine Tveit.

The Belle Jar

"Let me live, love and say it well in good sentences." - Sylvia Plath

Nerdy Book Club

A community of readers

Myfanwy Tristram

Politics, activism, social memoir, reportage and fashion comics

Travel Oops

Travel humor and a celebration of travel missteps, mishaps and misadventures